


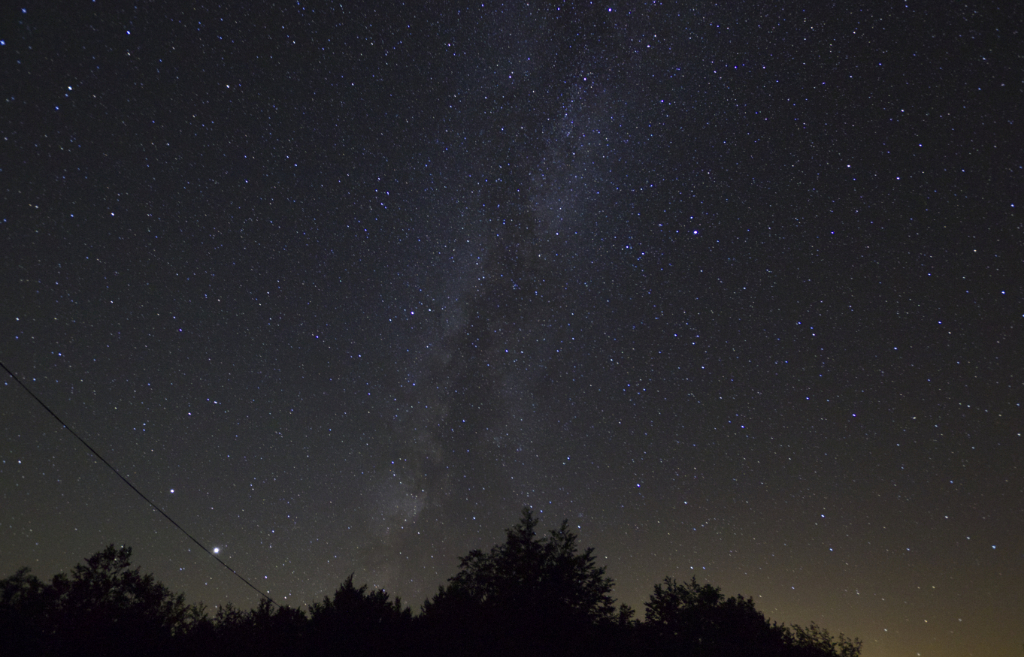
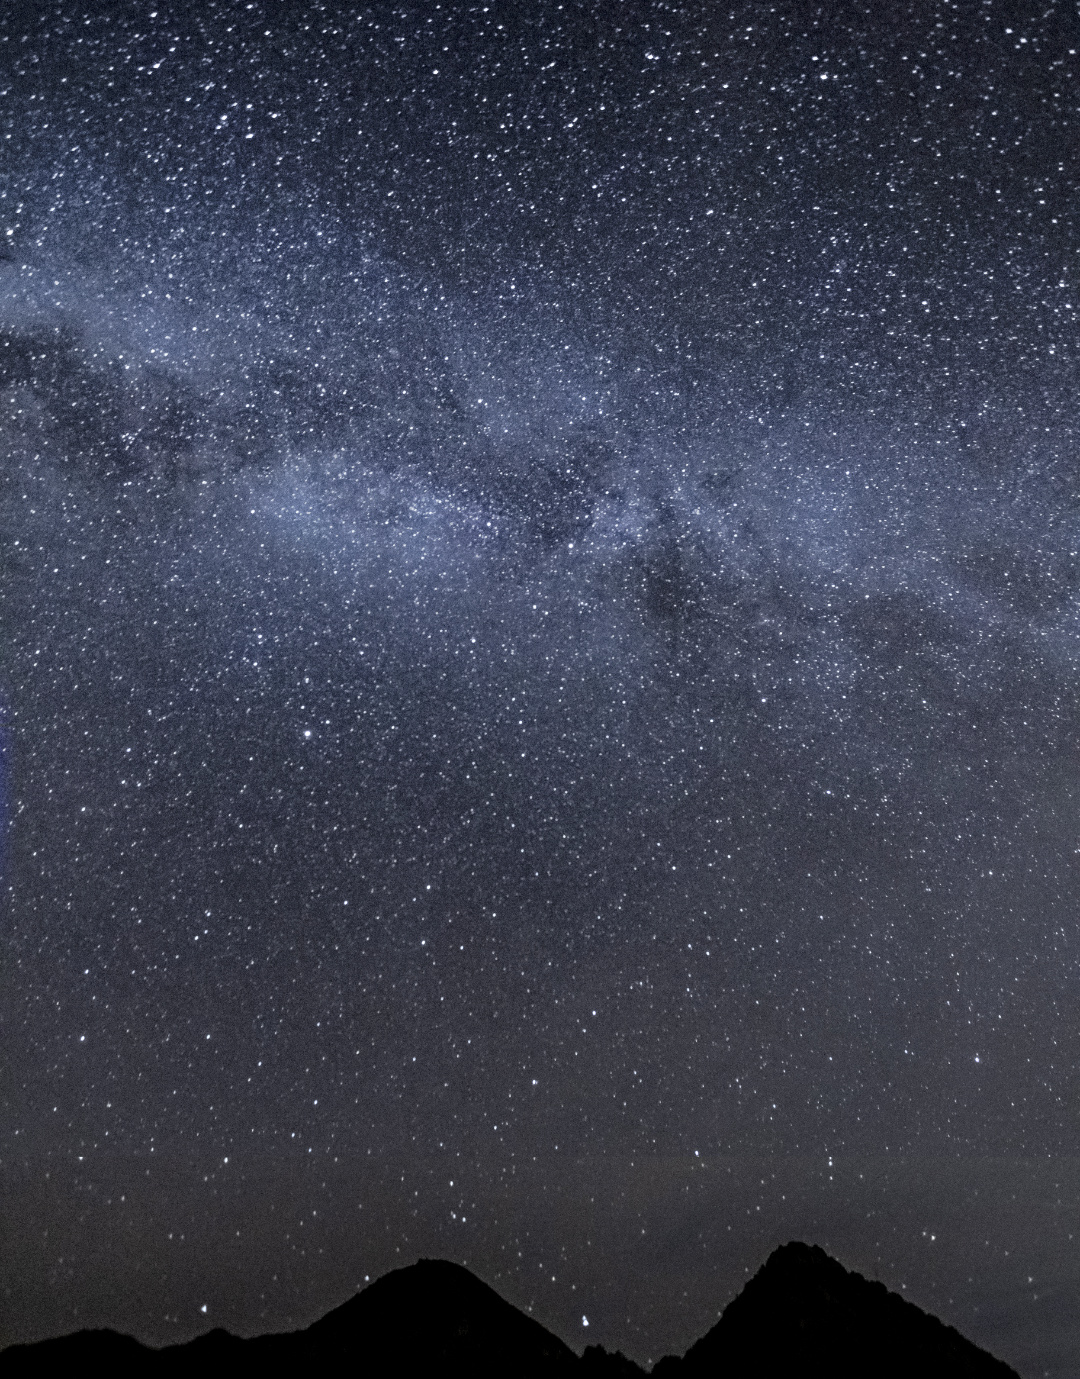
Milky Way is one of the most popular subject when it comes to night sky photography. One of the most commun, but far from being the easiest to photograph.
I/ Equipment
- Stable tripod
- Camera
- Remote control
- Bright lens
- Viewfinder cover
- Headlight (RED)

Camera: Prepare a camera that allows full manual control of settings (focus, ISO, shutter speed, aperture, RAW), and make sure it can goes up to ISO 1600-6400.
Lens: You’ll need a wide-angle lens with an aperture range of f/1.4 to f/3.5 max and a focal length between 10mm and 24mm (e.g., Sigma 10-20mm F3.5 EX DC HSM, Canon EF 12-35mm f/2.8 III USM).
II/ Find a spot
Once you have gathered all the equipment, you need to plan your night outing before going anywhere: determine when, find a clear dark sky without light pollution, the place must be easily reachable without dangerous pathway and check the weather.
The best time to observe and picture our galaxy is definitely summer time (from the northern hemisphere). If August remains the most recommended month to photograph the Milky Way because of the clear visibility of the galactic center, you can just as well photograph it from May to September.
Glance over that interactive map to find the darkest place near you. It’s a pretty powerful tool. In the top right hand corner, you will find a few settings and the legend.
Light Pollution Map®
Now, use a map or a GPS to see how you are going to get to your spot. Make sure the roads are passable and clear. If you can, practice that route during the daytime and take avantage of it to make a little spotting.
Remember to check the weather forecast for the night by paying particular attention to clouds. Indeed, if a cloudy night is coming, it’s better to postpone your session.
Finally, if you don’t have the opportunity to do your shooting during a New Moon (recommended), cast a glance at the Moon’s position for the period of time corresponding to your night outing. No matter how you found the darkest place without light pollution, if the Moon is raised in the sky, your pictures might be missed because the radiated amount of light would be too significant and would weaken Milky Way’s one. I’m used to using the NightSky app to see the Moon and Milky Way’s positions.
III/ Setting up & Camera Settings
As always, find a flat and stable ground where your tripod won’t move during shooting. Use the headlight you brought to see clearly where you are heading through. Now that you’ve found your spot, set up your equipment safely.
Before starting framing you got to find to find the Milky Way in the dark sky. It’s more or less simply to catch sight of it with the naked eye, but once again you can use the NightSky app to help you locate it.
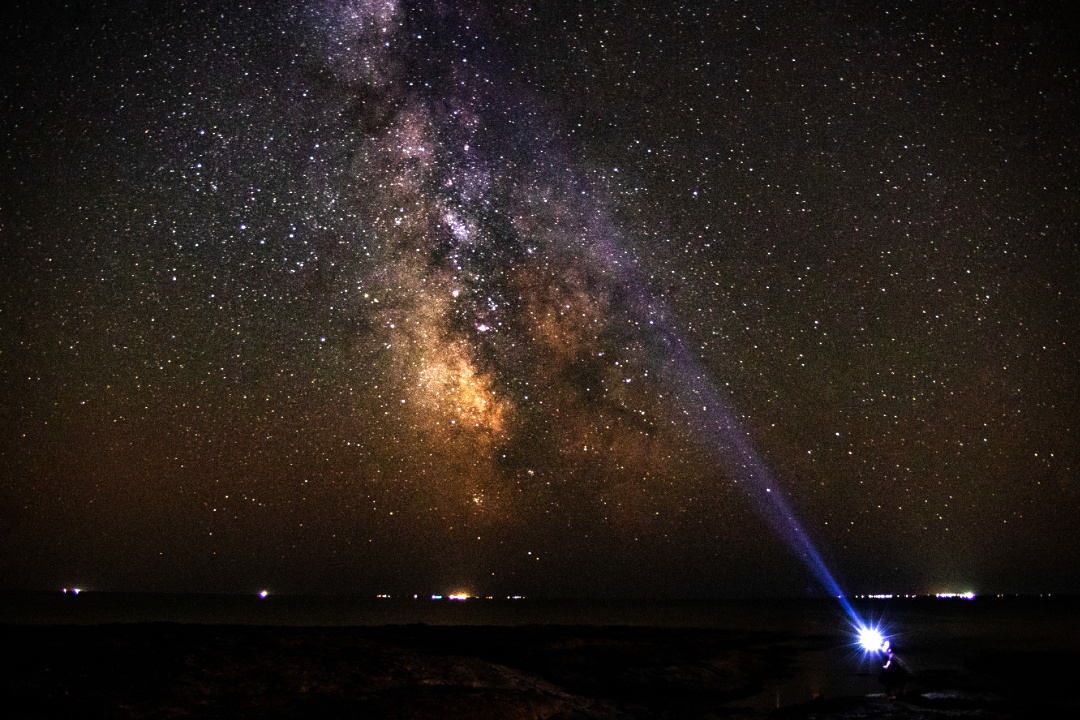
Let’s talk about composition. You have different options: some people just want to shoot the Milky Way itself but others will want to include it in a scene, with a foreground. So, if you are looking for a composition of different elements and don’t make out what is in front of you, use the headlight as well. It will be useful to center your camera and create a picture with interesting features you found around.


From this step, you can turn your headlight in red. Red light won’t distrub you during your settings and shooting. Set your camera to manual mode, make sure to be in RAW and start with these basic camera settings:
Aperture: Use the largest aperture of your lens to allow as much light as possible to enter (e.g., f/2.8 or f/1.4). The wider your aperture will be, the shorter your exposure time will be.
ISO: Use a pretty high range from ISO 1600 to ISO 6400. Be careful not to go beyond that, otherwise your images could be too noizy with a rough grain.
Focus: Focusing at night can be tricky, this is the reason why I advise you to get rid of the autofocus and realize your own focus. Turn on live view and go to a mannual focus, then zoom in a bright star and focus on it through the screen. From now don’t touch this setting anymore. (NB: You never have to worry about the infinite logo on the focus ring! It could be a real trap.)
Shutter speed: You need to use long exposure to capture a detailed night sky, but that time must be accurate in order to avoid any kind of star trails. We can’t actually determine a usual shutter speed, but you can figure it out. Indeed, there’s a simple rule called « 500 Rule »: 500 divided by your focal length (e.g., 14 mm → 500/14 = 35 sec). Here are some calculations:
| Focal Length | Shutter Speed |
|---|---|
| 10mm | 50 sec |
| 16mm | 31 sec |
| 20mm | 25 sec |
| 24mm | 21 sec |
Once everything is ready put the viewfinder cover on and shoot! During your session, play with settings, be creative and try different compositions… (NB: Use your remote control to trigger remotely and avoid vibrations.)
[Photo]
IV/ Editing
There is a large number of photo editing software you can use like Affinity Photo, Lightroom, Photoshop, Camera RAW, etc… Editing is one of the most important part in astrography because your raw pictures will be dull, and it’s normal. So you’ll have to make them shine and increase/modify some variables like contrasts, brightness, white balance, colors, blacks and whites. Sometimes, there may be stains, power lines, or just too bright stars to erase.
Editing is also a very personal and subjective part of the process. Each artist will have his own way of interpreting his own picture to bring it the right adjustments. There no way of retouching a Milky Way image, possibilities are countless and give you the opportunity to show your creativity…
This is an example of what I did with one of my pictures. Drag the slider to see before and after post-processing:

V/ Some Works


Thanks!
J’aimeJ’aime